The skills of a proficient golf course worker are prominently demonstrated during the process of cutting a fresh hole into the green and filling and repairing the old hole.
The process is quite simple, yet so many things can and do go wrong. The hole may be mistakenly cut on a slant, which makes the hole slightly oblong instead of circular. The cup may be too far below the surface of the green, or worse, too close to the surface.
When the lip of the cup is less than an inch below the grass surface, golf balls that were destined to drop to the bottom of the cup may be instead hit the high lip, be deflected, and bounce out. If it happens to the tee shot on a par 3 hole, it may result in the thrill of an ace spoiled.
The plug that is replaced in the old hole is often put down either too deep or not deep enough. Both cases are unacceptable but unfortunately happen often on many courses.
Table of Contents
7 Steps To Changing A Hole On A Golf Course
The following seven steps should be strictly followed when changing a hole:
Step 1
The hole cutter should be in a good working condition. The blade must be super sharp, and in order to keep it that way, it should be routinely sharpened or filed. If the hole cutter has been in use for more than five years, it could be time to purchase a new, improved model.
Step 2
In addition to the all-important hole cutter, there are several other items that are part of the necessary equipment that should be carried in the maintenance vehicle:
- A cup puller and a cup setter
- A sponge or towel to clean the cup
- A water bottle to water the replaced plugs
- A knife or a flat screwdriver
All of these items can be carried in a 5-gallon pail or in a “cup cutting caddy.”
Step 3
Select the place on the green where the new hole is to be cut. Usually, superintendents systematically set up the course hole placements and predetermine the hole location, which is shown on pin locator sheets.
There should be a minimum of a 2–3 foot level area surrounding the hole. First, plunge the hole cutter vertically into the green.
Next, twist it down a few inches farther, carefully extract the plug, remove it from the hole cutter, place the plug in the pail, and then make the second cut to the desirable depth.
Painting a white mark on the cutter blade to designate the depth of the hole is a helpful visual aid.
Step 4
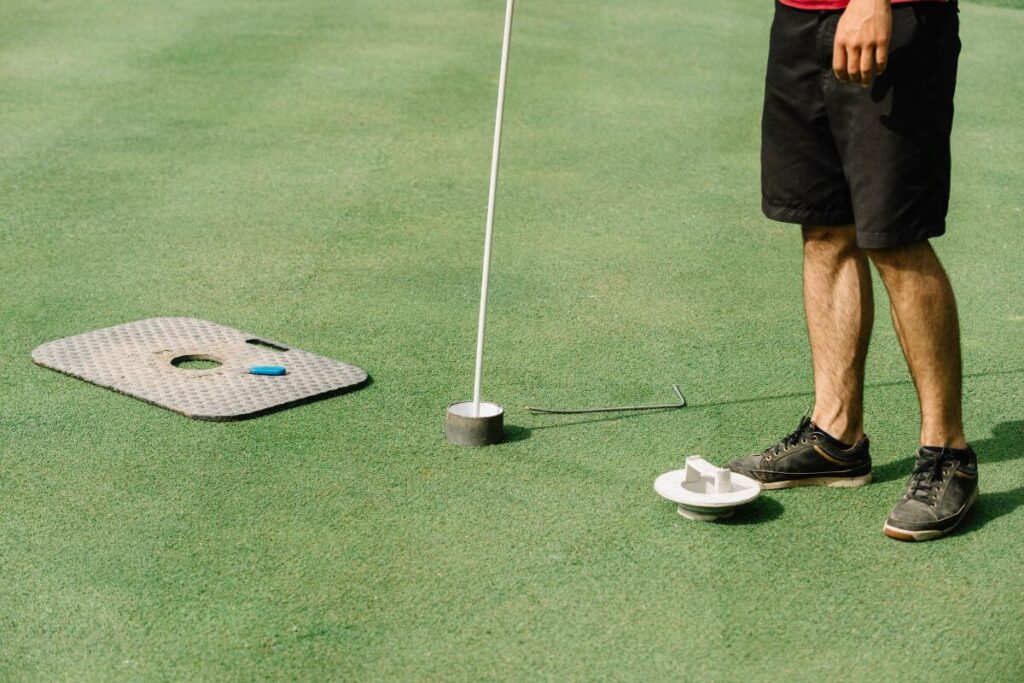
Remove the cup from the old hole, and use a moist sponge to clean the inside of the cup thoroughly. Replace the neatly cleaned cup into the new hole and use the cup setter to press it down firmly to the desired depth.
Brush away any bits of soil that remain around the new hole. Extremely particular superintendents will use a pair of scissors to snip off any misplaced blades of grass hanging over the lip of the hole.
Keeping the cutter blade sharp will make this step unnecessary. Try to keep an extra set of cups on hand to change the cups periodically during the season. Keep the cups clean and fresh looking all the time, and you’ll be a hit with the golfers.
Step 5
The next step is to replace the plugs into the old hole, while checking to make sure that the plug is level with the green.
If necessary use a knife or a screwdriver to scrape the green mix between the lower and the upper plug, which will help the roots find their way downward.
Press down with your foot on the plug to level it with the surrounding grass. Water the plug around the edge to form a seal with the surrounding turf, thus making sure the plug will survive the heat of day.
Clean up and make sure that any evidence of an old hole has been removed. If the plugs have too little green mix, the grass plug will sink; if the plugs have too much green mix, the plug will be scalped by the greens mower.
Step 6
If colored flags are used for hole location, select the appropriate color flag for the new pin position to complete the process. Visually and physically check how the pin fits into the hole of the cup. If the fitting is loose, it probably means that either the pin or the cup should be replaced.
A loose-fitting flagstick can easily bend with a brisk wind and at times may lean inside the cup in such a way as to prevent golf balls from entering the hole.
Step 7
Finally, when the hole has been changed, observe from a distance, making sure that the flagstick is standing straight in the cup. In addition to changing the hole, the person charged with that duty should also be responsible for other minor repairs on the green.
Changing the hole requires skill and attention to detail

Small scars on a green can be removed with a hole cutter and replaced with healthy plugs that are removed from inconspicuous areas along the back edge of the green. Also, old plugs that have been scalped or have turned brown can be replaced in this manner.
The hole changer’s duties may include repairing ball marks as well as always scouting for the first signs of disease. The hole changer is usually the first to know if the green is lacking moisture content.
The need for additional water on the greens should be communicated to the superintendent or the person in charge of irrigation. The responsibilities of the hole changer are complex and time consuming, and therefore some 18-hole golf courses employ two people to change holes: one for the front nine and one for the back nine.
The hole on the green should be changed after approximately 200–250 golfers have played, which in many cases is after a day’s play.
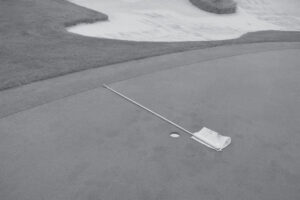
Changing holes should be a daily routine, except in the shoulder season, when some days can be skipped. In the event that the holes have not been changed, the cups should still be checked and if the edge of the hole has been damaged, it should be changed, regardless of how many people have played the course. However, once a competition is in progress, the location of a cup cannot be changed.
Damaged turf on the edge of the hole should be changed unless a competition is in progress

Cut Placement And Flags On The Green
Routinely moving the hole or the cup on the green can contribute significantly to the overall quality of the green. Moving the cup on large greens can easily spread the wear, but on small greens, changing the location of the cup and maintaining quality turf usually requires a well-thought-out system.
The problem is frequently exacerbated by undulations in the putting surface that limit the number of hole locations.
Most systems that have been devised and implemented to institute a regular process for locating hole placements from the front to the center and to the back, usually work well on large, sprawling greens.
The hole can be placed almost anywhere provided that the adjacent surface is reasonably level and the location is away from the edges and the hazards.
The next day the hole can be moved as planned in accordance with the selected system, which allows the turf to receive plenty of rest between days of play. On smaller greens, the hole often needs to be closer to the edge of the green.
Contrary to popular belief, there is no rule in golf that dictates pin placement. The recommended distance is 12 feet or 4 paces from the edge of the green.
Often the flagpole is used as a yardstick for measuring the placement of the cup location which should be slightly beyond the length of the flagpole and away from the edge on a level area of the green.
The pin is used as a yardstick for hole location on a green. A location within the length of the pin is too close to the edge; a level location beyond this is acceptable.
Some superintendents systematically set up the course hole placements; with six hole placements in the front third of the green, six in the center of the green, and six in the back of the green.
There are a number of other options when using this simple, straightforward method, but most are more complex. Other superintendents divide each green into six equal parts, with each part being numbered 1 to 6. A pin locator sheet, which shows all the hole placements, is then posted near the first tee or visually displayed on the golf cart.
During tournaments and other competitions, pin locator sheets are made available to the players, which provide detailed information in feet about the exact location of the cup.
Determining Hole Location
The majority of golfers are content to see their shots land on any portion of the green, and for those golfers the front, center, and back method is more than adequate.
Several systems have been devised to help golfers determine where the hole is located on the green. These include:
Colored Flags
Colored flags are often used for designating pin placement. Different colors can represent different locations, for example: blue flags can be used when the hole is at the back, white flags when the hole is in the center, and red flags when the hole is in the front; this or any variation of color designating placements can be used.
This method requires that the hole changer carry extra flags or flagsticks with colored flags attached.
High Tech Laser
The most often used system to determine hole location is the high-tech laser method, which measures the distance to the pin with an electronic device.
A receiver is attached to the pin and a beam from a handheld gun or laser device that is attached to a golf cart measures the distance instantaneously. This system is precise and quick, displaying exact yardage, which can assist golfers with club selection.
Indicator Flags
Occasionally used but decreasing in popularity are pin placement indicator flags that are attached to the flagstick and slide freely; the downward movement of the indicator flag is impeded by a tight rubber ring.
The position of the pin placement indicator flag reveals the location of the hole and can also provide suggestions such as “please repair ball marks.” A variation of the placement flags is the use of colored plastic balls that slide up and down the flagstick.